At Isis Chiropractic Centres, we see a wide range of cycling-related injuries—everything from neck, shoulder, and lower back pain to foot issues. Most of these injuries are due to overuse, rather than crashes or trauma. This is common in endurance sports, especially among long-distance cyclists and triathletes.
As more people train for triathlons, we’re seeing injuries that may not seem directly related to cycling but still impact performance on the bike. This leads to one of the most common questions we get:
“How should I set up my bike to prevent injuries and improve performance?”
Whether you’re racing, touring, or mountain biking, your bike’s set-up plays a major role in both comfort and injury prevention. It’s about finding the right balance between aerodynamics, power, and body positioning.
Racing cyclists often adopt a lower torso position for speed, which can increase strain on the neck and shoulders.
Touring cyclists usually prefer a more upright posture, which improves comfort but may reduce power and aerodynamic efficiency.
Each type of riding requires a different approach—but the goal is the same: improve performance and avoid pain.
Three Key Contact Points: Pedals, Saddle, and Handlebars
Your body connects with the bike in three main places:
Pedals – Your big toe joint should align with the pedal axle.
Saddle – Your sitting bones (ischial tuberosities) should rest toward the rear of the saddle.
Handlebars – Hands should rest comfortably on the hoods or tops.
Getting these three points aligned correctly helps your body move efficiently with the bike.
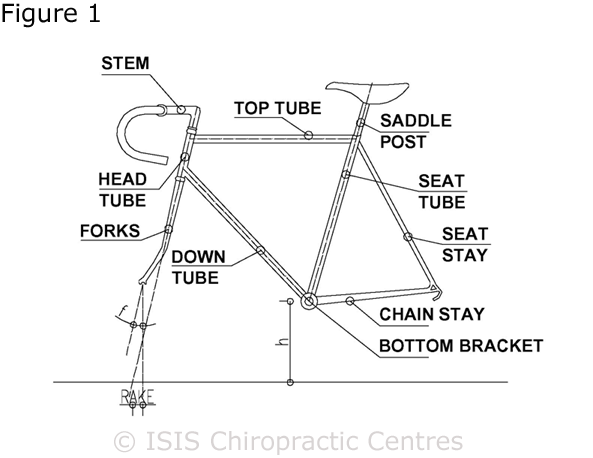
Understanding Bike and Body Anatomy
To fit your bike properly, you need to understand both the bike and your own body. Here’s a quick guide:
Bike Anatomy Terms:
Top tube, down tube, seat tube, head tube
Bottom bracket, seat stays, chain stays
Fork blades, handlebar stem, saddle post
These components affect your riding posture and can be adjusted for comfort and performance.
Human Anatomy Terms:
T (Thigh) – Hip to knee
L (Leg) – Knee to ankle
A (Arm) – Shoulder to wrist
F (Forearm) – Elbow to wrist
How to Measure Your Body for Bike Fit
Use a tape measure, cycling shorts, and socks. Here’s how:
1. Inseam (I):
Stand with your feet 10 cm apart. Measure from the top of your inner thigh to the floor. This is the most criticalmeasurement.
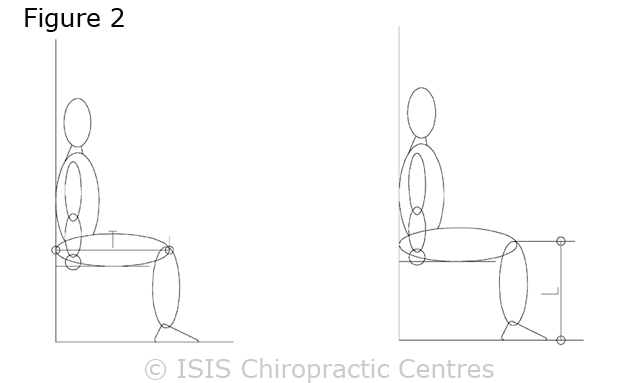
2. Thigh (T):
Sit on a stool with your back flat against a wall. Place a ruler across your knees and measure from the wall to the ruler.
3. Leg (L):
Same position as for “T”. Place the ruler on your knees and measure down to the floor.
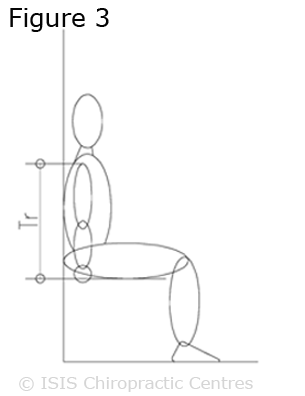
4. Trunk (Tr):
Sit as above. Press your shoulders against the wall and measure from the top of your shoulder (near collarbone) to the stool.
5. Arm (A):
Hold a cylinder (the same diameter as your handlebars) with your arm outstretched horizontally. Measure from the wall to the cylinder.
6. Forearm (F):
Bend your elbow to 90 degrees and raise your upper arm to 45 degrees. Hold the cylinder perpendicular to your forearm. Measure from your elbow to the cylinder.
Measuring the Bike
Once you’ve measured your body, match those numbers with these bike measurements:
1. Saddle Height (SH):
This is crucial. Measure from the centre of the bottom bracket to the top of the saddle (parallel to the seat tube). Formula: SH = Inseam (I) × 0.885
Tip: If your current saddle height is lower than calculated, raise it slowly—just a few millimetres at a time—over several weeks or months.
2. Saddle Setback (SS):
Drop a vertical line from the bottom bracket and mark it on the top tube. Use a carpenter’s square to measure from the tip of the saddle to this line.
3. Saddle–Handlebar Distance (SHB):
Measure from the tip of the saddle to the back edge of the handlebar. A longer torso and arms allow a longer reach here.
4. Saddle–Stem Height (SSH):
This is the vertical difference between the saddle and the handlebar stem. Adjust it to match your comfort level. Some cyclists prefer up to 10 cm of drop.
Putting It All Together
Start with the saddle height and setback, as they influence everything else. Then, adjust your handlebar reach and height to match your body dimensions and flexibility.
Remember: Comfort = Efficiency
Don’t rush changes. Give your body time to adapt, especially if you ride or train regularly. New angles across your hips, knees, and ankles can strain muscles and tendons if introduced too quickly.
The Most Important Fit: How It Feels
While measurements provide a great starting point, every cyclist is unique. If a specific setup doesn’t feel right—even if the numbers say it should—go with what feels best for you.
There’s just as much art as science in fitting a bike. Much like chiropractic care, it’s about finding the right balance for the individual.
Ready to Ride?
Proper bike set-up can dramatically reduce your risk of injury and boost your performance. If you’re unsure about your fit or struggling with cycling-related pain, our chiropractic team can help.
Introduction Headaches can disrupt your entire day — affecting your mood, focus, and productivity. While pain relief can help, the best approach is often to prevent headaches before they start.Here are simple, effective tips to reduce how often headaches occur and how intense they feel. 1️⃣ Stay Hydrated 💧 Dehydration is one of the most
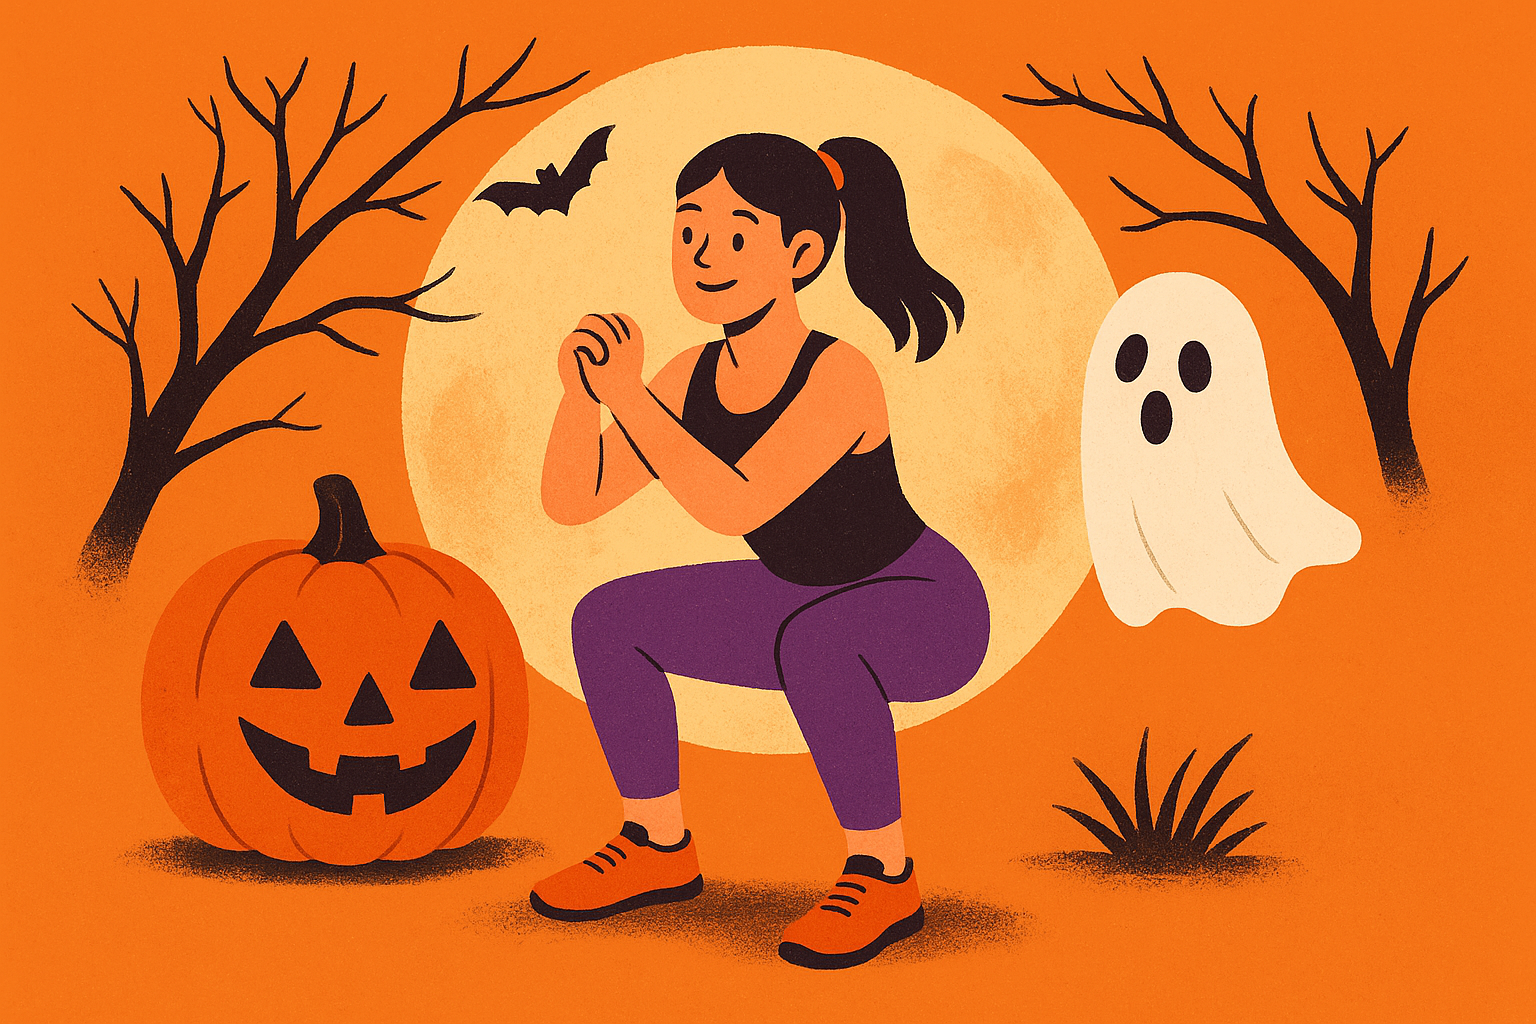
🧟♀️ Introduction Feeling a little spooked by stress or haunted by anxious thoughts this Halloween season? 👻 You’re not alone! While we often think of exercise as a way to strengthen our bodies, it can also do wonders for our mental health. 💪🧠 Research shows that regular physical activity can help reduce symptoms of depression
Lower back problems can be frustrating and overwhelming. It affects your mobility, posture, and overall wellbeing. The pain can be debilitating and can affect your daily routine. While there are numerous treatment options available, balance training is one of the best and most effective ways to address lower back pain. In this blog, we will
Winter is a season when many individuals experience health issues that can make everyday life rough. Whether it is a cold, flu, or a skiing injury, many people will find their overall health compromised at some point during winter.
Thankfully, chiropractic care can help keep you healthy during winter. Paying a visit to your chiropractor during the cold season can help reduce, if not prevent, health problems as well as keep you feeling your best.